Wednesday, December 21, 2016

Goose on the Loose :: A Month Off

My group decided to take the month of December off since our meeting day fell so close to Christmas.

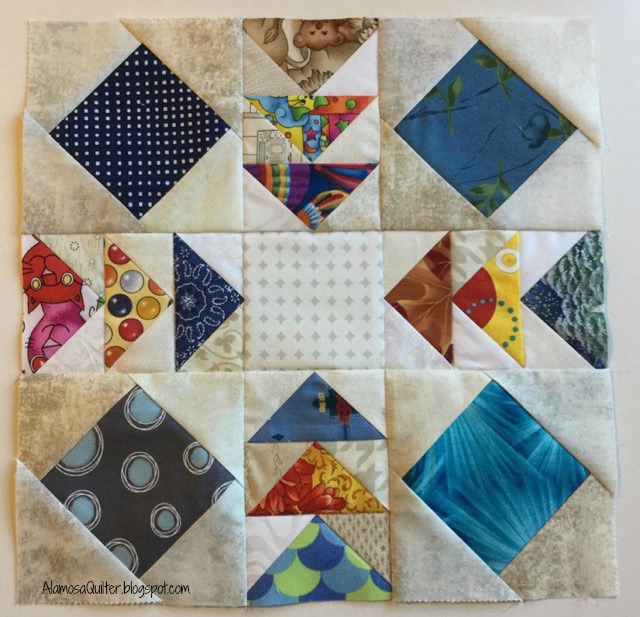
Here is a collage of the first nine blocks we have done.


We've actually made 10 blocks but I got frustrated trying to make a collage with 10 images and quit. All the details about this quilt along can be found on the Goose on the Loose page of this blog. The eleventh block will be release January 18, 2017 and the final block will be released the third Wednesday in February. In March I will offer setting and border suggestions, but this is your quilt and you should feel free to finish it how ever you want.


Friday, December 16, 2016

Festival of Stars

I finished the top yesterday. Click here for the previous post.


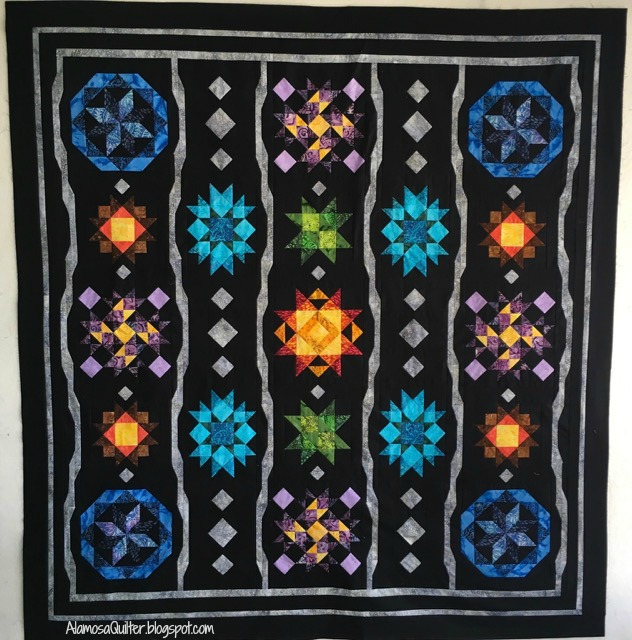
The finished top will measure 78" by 83.5". It was really fun to work on a challenging quilt for a change.


Friday, December 9, 2016

WIP :: Festival of Stars

I've been working for a few weeks on a BOM that I will be running through my shop. The pattern is called Festival of Stars. I have all of the star blocks made.


This is not a beginner project! It has been a fun challenge for me to work on something that isn't designed as a "quilt in a day" type project.

There are some small square in a square blocks that float between the stars and a very interesting sashing between the columns still to do. I hope to have the top completed soon so we can start taking sign-ups.


Wednesday, December 7, 2016

Art Group Project :: Part 4

Click here for previous posts about this project: Part 1, Part 2, and Part 3.

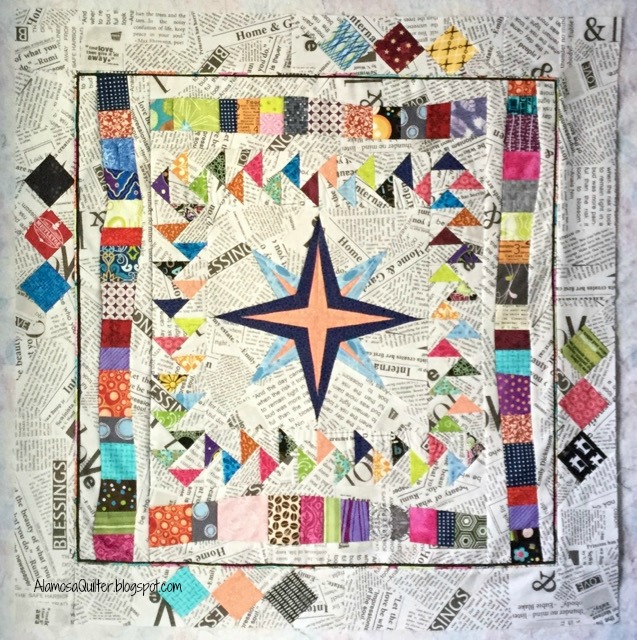
At this point we have completed 5 of 6 rounds. This is what mine looks like at the moment.


It's about 34" square at the moment. We'll get our instructions for our last border technique next week.


Monday, December 5, 2016

2016 Ornament

My ornaments for this year are made!


The center one, the one with a button, is the first one I made. My original plan was to put a button in the center of them all. I'm rethinking that now. I don't have any more of those black buttons and I don't have enough of any one button for the rest of them. They don't all need to have the same button in the center, but I don't have enough buttons I think will work for these. And I think they are pretty cute without buttons. So I'm calling them done.

These are each made from five 2.5 squares. I used mini charm packs of the three Moda Christmas lines I have in my shop: Jol, Cookie Exchange and Juniper Berry. They finish at 2" square.

The construction method I used is similar to this folded fabric hot pad tutorial. I only used 5 squares and no batting for these since they are just ornaments, but the idea is the same.


Wednesday, November 30, 2016

Just a Walk Dolls

These are from the third fabric line I have gotten in my shop that comes with a doll or stuffie panel. This fabric line is called Just a Walk and it's from Moda. I made the dolls last week and they are adorable!


As with the previous fabric lines, one yard of fabric makes everything you see here: two dolls, a skirt for the girl doll, a bear, a bunny, a pillow (behind the boy) and a quilt. These are easy and fun to make!


Sunday, November 27, 2016

Elephant Bag Cover

I've started a new Sue Spargo project. Here it is with all the applique done but before being embellished with embroidery stitches.


The pattern is from her book Folk-Tails. It will be a cover for a Yazzi bag. I hope to have it finished before the end of January. I expect to receive my first kit for Sue's 2017 BOM at the end of January. I'd like to be able to use my Yazzi bag to keep all my BOM stuff together for the year.

The last time I did one of Sue's BOM I had to work by myself. This time I have four local friends who are doing it too! We are planning to meet at least once a month at my shop to work on the blocks together. Looking forward to it!


Friday, November 25, 2016

Mini Trees

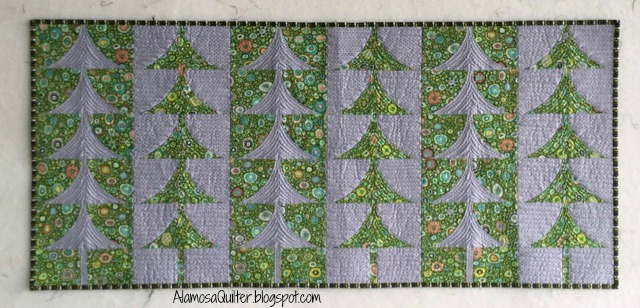
'Tis the season for holiday sewing! I made up this fun runner earlier this week.


The pattern is a free pattern from Sew Kind of Wonderful. Click here to go to their free patterns page. You do need their Mini Quick Curve Ruler but the pattern itself is free. It was fun to make too! I really like their version in solids but opted to use print fabric for my version. Finished size is 20" by 45".


Friday, November 18, 2016

Towel Apron

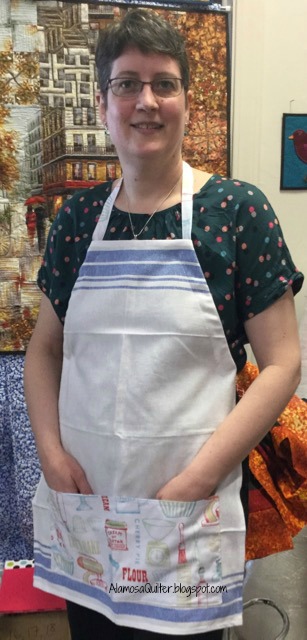
Last weekend we held a very successful sale and demo day at my shop. The demo was for this fast and fun to make apron.


You need a towel and 1/2 yard of fabric to make one. Here is a link to a tutorial on how to make one for yourself. The towels we used retail for $4.99 so with the addition of a half yard of fabric you can make one of these for about $12 or less. It's a nice price point for a homemade gift.


Wednesday, November 16, 2016

Goose on the Loose :: Block 10

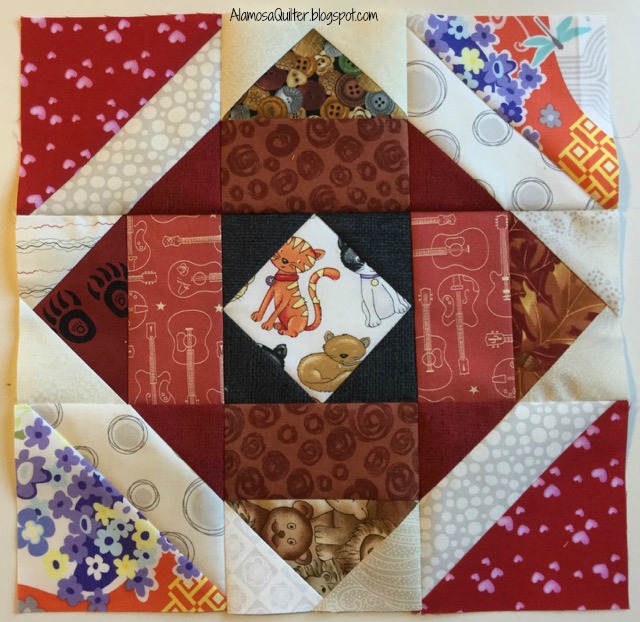
This is the block for this month.


Here is what you will need to make one: (2) 5" squares of scrap fabric and (2) 5" squares of background fabric for the corner units; (1) 4.5" square for the center and (8) 2.5" squares for corner triangles; (4) 2.5" by 4.5" rectangles of scrap fabric; (1) 5.5" square of scrap fabric and (4) 3" squares of background fabric for the flying geese units.

If you made extra flying geese previously, just pull out four of them and trim them to 2.5" by 4.5".

Make your flying geese units using your Wing Clipper Ruler. These should be trimmed to 2.5" by 4.5" (which makes 2" by 4" finished size flying geese units). If you don't have a Wing Clipper ruler you can still make the block. Just choose another technique. Here is a link to four other techniques for making flying geese units. Make sure that your flying geese units are 2.5" by 4.5" unfinished.

To make the half square triangle units for the corners, draw a diagonal line on the back of your (2) 5" squares of background fabric. Put these right sides together with the (2) 5" squares of scrap fabric. Sew 1/4" seams on either side of the diagonal line. Cut them apart on the line and press to the darker fabric. Trim them to 4.5" square.

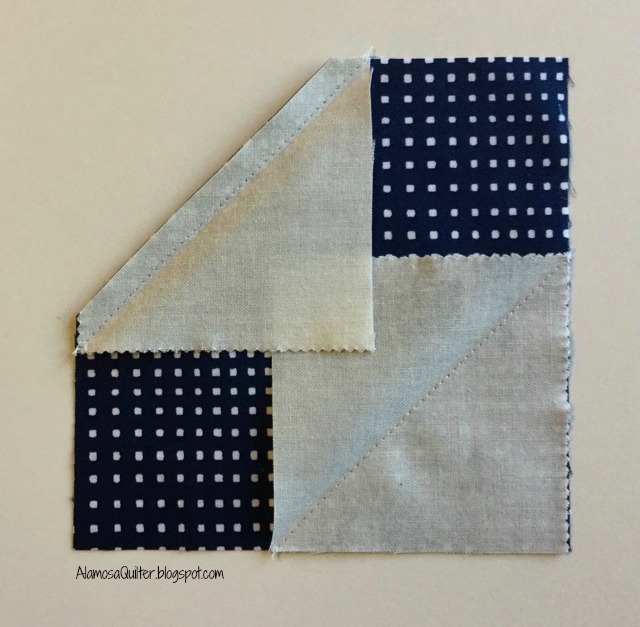
Draw a diagonal line on the back of your (8) 2.5" squares for the corner triangles. Four of these will go on the corners of your 4.5" center square. The other four will go on your half square triangles. See photo below.


Place a 2.5" square on one corner of one of your half square triangle units. Sew on the drawn line and trim 1/4" away from the sewn line. Press. Repeat for all of your half square triangle units.

Place a 2.5" square on one corner of your 4.5" center square. Sew on the drawn line, press and trim 1/4" away from the sewn line. Repeat with the remaining (3) 2.5" squares and the other three corners of your center square.

Sew one of the 2.5" by 4.5" rectangles to one of the flying geese. Repeat for the other 2.5" by 4.5" rectangles and flying geese units.


Layout the pieces as shown in the photo above and sew them together to complete the block.

If you have any questions leave it as a comment. I'll get back to you personally if I can. If not, I'll leave the answer as another comment.


Monday, November 14, 2016

Sampler Spools :: A Finish

Another shop sample is finished and ready to hang at the store.


This one is a kit featuring Bonnie and Camille's newest fabric line for Moda, Handmade. It finishes at about 60" by 72". I love the top and bottom borders but my favorite has to be the black & white stripe binding fabric.


Tuesday, November 8, 2016

Piecing Done

I was able to get my Sampler Spools quilt finished before closing on Saturday.


I got it basted together on Sunday. I worked on the quilting yesterday, my day off from the shop. Mondays are my day to do the shopping, laundry, some cooking for the week, book work for the shop, and ordering for the shop. In between all of that, I sew a little too, usually for the shop.

This quilt is a kit. It supports the Handmade fabric line for Moda by Bonnie & Camille. I love Moda kits. They are all packaged so nicely in boxes that match the quilt. These boxes make great project boxes for other things once the quilt they originally housed is made. I love the binding fabric. It's a black and white stripe printed on the bias. You'll have to wait to see that, but hopefully not too long.


Friday, November 4, 2016

What I'm Working On

It's been a busy week! This is what I'm working on right now, another shop sample.


There are 36 blocks total. I have them all made but didn't get a photo of them all on my design wall. The pattern is called Sampler Spools and this is kit I have available in my shop. It uses the new Bonnie & Camille fabric line called Handmade.


I have two rows sewn together and will hopefully get it put together before the shop closes on Saturday so I can get it quilted this weekend.

On second thought, maybe I shouldn't hope to get it put together before we close on Saturday because that would mean we were really busy today and Saturday!


Friday, October 28, 2016

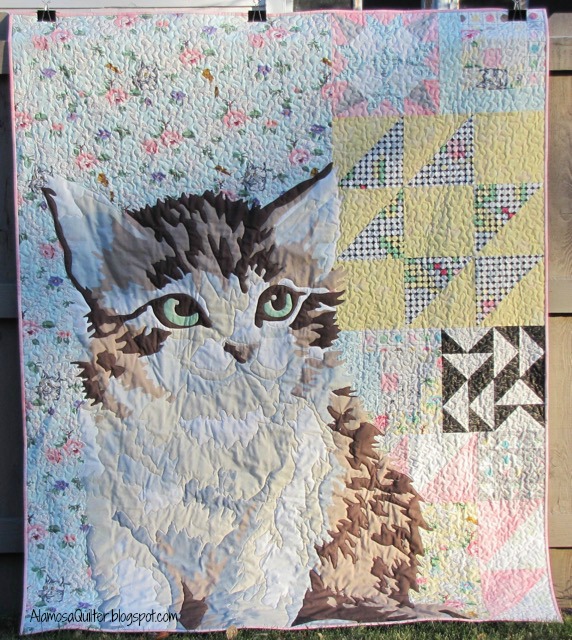
Meow or Never Quilt :: A Finish

I was able to get this quilt quilted over the weekend and finished the binding last night.


I love how it turned out! For the back I chose a dot print from the fabric line. When it is up close you just see dots, but when you stand back ...


the dots make a design of flowers in a vase. The reason some of the vases are upside down is because I had to piece the back.

All the details of this quilt are in my previous post on this project. Click here to read that post.


Wednesday, October 26, 2016

Mini Pumpkins :: A Finish

I finished my Mini Pumpkins quilt! This was so fun and quick to make. Although it did take me several hours to quilt it, about 5 hours.


The pebble quilting is time consuming but worth it! The pumpkins and stems are quilted in the ditch. If you want to see what it looked like before quilting, click here.

The finished size is 36" by 36". 


Monday, October 24, 2016

Strip and Flip :: A Finish

I finished the Strip & Flip quilt I shared with you recently. The pattern details are all in the link.


It was fun to quilt.


I thought about quilting it horizontally following the piecing lines but decided to change things up and quilted it vertically instead. Simple lines of loops made for speedy quilting.

For the back I used the woven-look print from the fabric line.


The quilt measures about 46" by 54" so it is wider than width of fabric. The brown text print from the fabric line matched nicely with the woven-look print so I was able to extend the fabric with a strip along the side to make it wide enough.

For binding I used leftover strips from the jelly roll. So one jelly roll and 1/4 yard of contrast fabric for the vertical strips on the front are all that is required for the top and binding of this quilt. This one will be a shop sample but I plan to make another using Judy's fabric for my guild's oncology project.


Friday, October 21, 2016

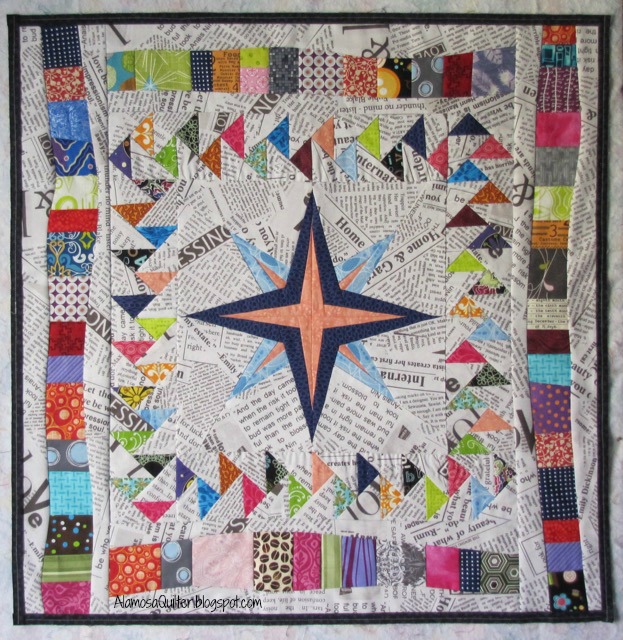
Art Group Project :: Part 3

For the details about this project, click here to go to my first post about it and click here for the second post.

We have completed three rounds at this point and this is what mine looks like at the moment.


The first border is migrating geese, the second is improv piecing and the third is "3-D". I interpreted that as a flange, the thin black line around the outside. We received our instructions for the fourth round on Tuesday. I already have my plan. I just need time to do it.


Wednesday, October 19, 2016

Goose on the Loose :: Block 9

This is the block for this month.


To make it you will need:

(1) 3.5" square of background fabric for the center
(3) 4.5" squares of scrap fabric for the geese
(12) 2.5" squares of background fabric for the sky surrounding the geese
(4) 5" squares of scrap fabric for the corner blocks
(16) 3" squares of background fabric for the corner blocks

From the (3) 4.5" squares of scrap fabrics and the (12) 2.5" squares of background fabrics make twelve flying geese units using your Wing Clipper Ruler. If you made extra flying geese units previously, use them instead. The finished size of your flying geese should be 1.5" by 3", which means that you need to trim them to 2" by 3.5" before sewing them together.

If you don't have a Wing Clipper ruler you can still make the block using the Flip, Flip, Finish technique. You would need (12) 2" by 3.5" rectangles for your geese and (24) 2" squares of background fabric for the sky surrounding the geese.

If you need details about using the Wing Clipper ruler or the patterns for previous blocks, click here go to the Goose on the Loose Quilt Along page.

To make the corner blocks, draw a diagonal line on the back of each of your (16) 3" squares of background fabric. Take one of your (4) 5" squares. Lay one of your (16) 3" squares of background fabric right sides together on a corner of the 5" square.


The diagonal line should be going from one side of the 5" square to an adjacent side. See photo above. Sew on the diagonal line, trim off the excess 1/4" away from the sewn line and press the triangle back. You should again have a 5" square.

Repeat for the opposite corner.


Then repeat for the remaining two corners.


Sew your flying geese units together in groups of three. These should measure 3.5" by 5".


Then layout your pieces as in the photo below.


Sew it together in rows and you are done!


Monday, October 17, 2016

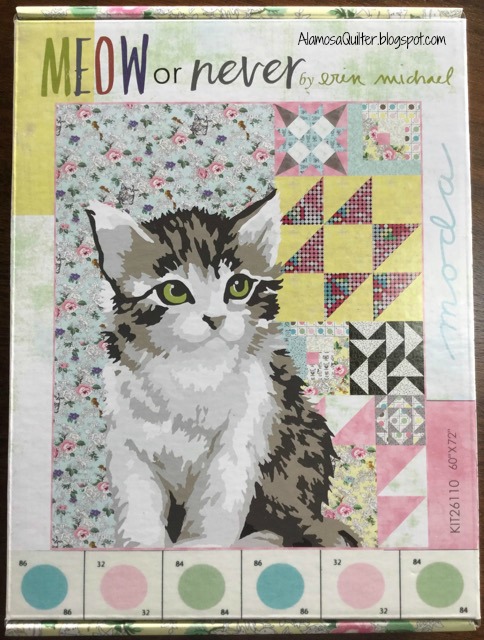
Meow or Never Kit

We recently received the fabric line Meow or Never from Moda in my shop. I ordered some kits with the fabric.


Moda kits are always so nicely packaged!

Over the weekend I was able to complete the quilt top.


It was too windy to hang it on the fence to photograph it, not that it would fit well on my fence anyway. The quilt finishes at 60" by 72". The kitty is a digital print. This means that the kitty is printed as you see her on a big piece of fabric. All you have to do is cut her out and fuse her on. Since she is so big, bigger than any ironing surface I have, it is a challenge to get her properly placed and fused. I ended up laying out the top on my basting tables and ironing directly on the table. Didn't hurt the table at all!

I didn't bring home any backing fabric from the shop so I didn't get her quilted. Just as well because this way I had time to do a little personal sewing. I'll show you that later this week.